Tampilkan postingan dengan label Living/Family Room. Tampilkan semua postingan

Jumat, 15 Juni 2012

Our Secret Craft Storage

This week's incredible reader space post put me into a crafty mood!  What can I say, I love me some color!


In fact, now that school is out for the summer, the boys and I went and restocked our craft supply bin.  And then I realized I haven't shared our craft supply bin with you.  The horror! 

I do my best to keep my crafts separate from the boy's crafts.  They aren't as gentle with the paints and markers and itty bitty pieces, so I let them have fun with their own items while I go on working with mine.

So while my craft supplies will ultimately be stored in the future studio space, the boy's crafting items are being stored and concealed in a super convenient and easy to access place.


No, I am not switching gears, those woven storage ottomans are the homes to all of the crafting goodness.  Who would have guessed?  Not many, which is why I adore them as a solution.  In fact, we just popped the ottomans in front of our living room sofa as a potential design remix "coffee table" solution, however, you have most likely spied them around our abode in many other posts as well {we have had those babies for years, you can find them here}.

Anyway, as we know, it's not about what is on the outside....


But what is on the inside that counts!


I found this Snapware storage bin to be the PERFECT fit!


By using a bin like this, we can just grab it out of the ottoman and take it right on over to the kitchen table to create and draw and paint.

So far, it has made great craft storage, since it can stack and clip together, and you can select how you wish to divide out the individual bins:


In one bin, I keep many of our coloring items; paints, crayons and markers:


In another, the smaller craft and supply items:


And in the last {which I ran out of dividers for}, larger items such as drawing pads, construction paper, pipe cleaners and a case of oil crayons:


And when we are all done, it clips back together nice and neat!


We are really limited on closet space, and since we almost always craft right at the kitchen table, using the storage ottomans has really been the easiest and most convenient solution.  We also use our art caddy, which I now keep on a shelf in the lower level playroom to promote impromptu creativity.

So now you know about my secret storage place.  What is yours?


Senin, 20 Februari 2012

A Happy Accident Side Table

Sometimes when things don't go quite as planned, there can still be a happily ever after...  I love those moments.  Especially when it is also creates a high end look on a budget.

Our guest room is in need of some side tables/nightstands since right now we just have a stool popped in as a temporary solution:


Being cheap, I thought I would just use a couple of $8 LACK side tables from IKEA.


It really doesn't look so awful in this photo, but it was oddly low and the size was all wrong.  Once the first one was together, I knew that it wasn't going to be the right solution for the room....

Since I live about an hour from IKEA, taking the table apart and returning both, wasn't exactly at the top of my "to do" list {although, you really don't have to twist my arm much to go to IKEA}.  Then, I remembered that I seen a great IKEA "hack" somewhere out in blogland.  This is why it's important to blog and share ideas; to save others in moments like these.

That hack had shown me that two LACK tables = one super awesome parsons side table.  You know, like the one from West Elm for $150 or Amazon for $100.  Yeah, those...


And we had other rooms in need of a side table.  Specifically, our newly finished family room in the lower level.

So to achieve the parsons table look with two LACK tables, we snagged four 3" screws and a drill:


Flipped the already assembled LACK table over and popped the top of the other kit with the pretty white side facing down {unfinished side up}:


There were already holes pre-drilled by IKEA, where the legs from the second table should have gone.  We just used those to screw the top to the bottom {got that?}:


Flipped it back over and we had a new parsons side table for $18!


Because there is only one table now, instead of two, we decided to use it in the family room at the end of the sectional {the over-sized brown leather one that we recently moved back down from the main living room}:


It's the perfect fit, and I just love how perfectly it worked out in it's completely unplanned and unexpected home!  Our happy accident!


Can't picture where it is exactly?  Stay tuned, tomorrow I am finally whipping out that floor plan post you have been asking for and that I have been promising to give for almost two years now.  Yahoo!

Time to chat about happy accidents!  Who else has experienced one lately that left you grinning ear to ear?  How about a fun IKEA hack to share?

Selasa, 14 Februari 2012

Greetings! How We Organize Holiday Cards

Happy Love Day!

It dawned on me this weekend that around the holidays, I was getting asked frequently about how I was going to organize all of the greeting cards I had received.  Then, it dawned on me that I hadn't actually ever shared the system with you.  Better late than never!  And since today, cards will be given and received, I thought it was the perfect time to pop in with our system.

Here is what I had started with:


Raise your hand if you have been there.  Or still are?  It's OK.  I promise you are not alone.

I love to take photos, but one thing that seems to happen is that I acquire photos of immediate family, mostly my kids and some of our pets.  Above and beyond that, the photos I have of most of our relatives and friends is limited.  That is why I love photo greeting cards.  I get to keep a great photo of my loved ones, each year!  But what good does it do me to leave them in a pile in a box?  How often do I take time to look back through the old photos and smile?  How often do my kids look at the pictures and watch everyone grow with them?  Not at all.  Because they are in a box.  Out of site, out of mind.

So, I decided to organize them a bit better.  I started out by sorting the photos into stacks, by family.  That way, I could go from there and easily figure out the year of each photo.


From there, I sorted down by year.


To encourage frequent trips down memory lane, I decided I would rather the cards live in a photo album on our family room bookshelf.


I found this album at Target for $8.  Not only is it acid free {which is always important when storing photos}, but it is also has the magnetic pages.  This was important because the greeting cards come in every single shape and size imaginable, and the pages give you the freedom to arrange however is clever {there are no dividers for each photo, just a blank slate of a page}:


The rest was simple.  I just printed the year on a 4x6 index card:


And then added the greetings from that year!  Everything from birth and wedding announcements, to birthday invites and holiday greetings.  Anything that has a photo of a loved one!


Some additional notes:
  • I saved the "year" index card template to my computer so each year I can just print another and keep on going
  • I used my paper slicer to cut down some of the edges of the cards to get them to fit
  • Going forward, I will be writing down the year on the back of the card when it is received, to make any future organizing a breeze
 Such a simple project, it only took me about 30 minutes to get my entire stack put into the album.  And I love it so much, I might just snag another album or two, to keep for expanding year after year.

I am sure you are wondering about greeting cards as well?  The kind without the photo.

I only keep those that are REALLY special.  You know, the ones with sweet words and kind thoughts.  The rest are recycled.  If I kept every single holiday and birthday card for each kid and the hubs and I, they would be coming out of our ears.

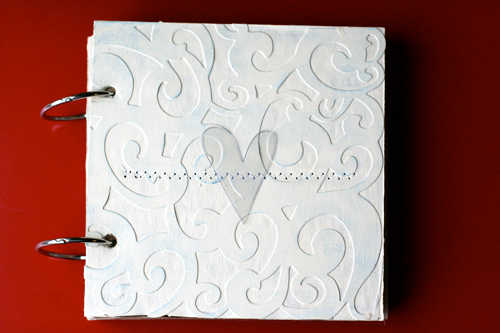
There are a couple of ways to preserve those cards, you could scan them in and keep them digitally, or you could make a card "book" out of them by adding rings:

{source}

Your turn!  How are you organizing your greetings?  Any other fun and creative ideas?  Love ya!


Senin, 19 Desember 2011

Happy Holidays: The Christmas Tree and a Ripple Effect

Today's post is a little bit of this and that.  A small tangent post if you will.  It's been awhile since one of those hasn't it?  It's mainly about our Christmas tree, but it comes with some more live time house updates as well!

I know that you may be thirsty for organizing projects galore, and trust me, I itch when I go a week or two without organizing anything.  In fact, the chances of that happening are quite slim.  Except during the holidays.  I am so busy getting my house in tip top shape, planning events and gifts, attending holiday programs, writing out holiday cards and decking the halls, that organizing moves down on the list a smidge.  Plus, it's important to me to be spending time with the family through it all, since I know how the holidays can become too crazy and that just isn't fair to the littles.  It's supposed to be a time of happiness and joy and not about hustle and bustle.

So far in our little holiday edition I have created a card display:


And a little dining room holiday display:


So where is the Christmas Tree?

Well, if you check in on our family blog at all, you may have seen that we picked up our Christmas tree last weekend.

We got it home and realized that it was a little on the big side...


We get a real one every year.  It's tradition.  And I LOVE the smell.  I have always gotten a real tree since I was a little lady, and I just haven't been able to make the switch to artificial...  And I love that my 5 year old thinks he knows the difference between a Fraser and a Balsam....

But, it was what it was.  And although it would be trimmed down a little bit, it wasn't going to shrink.  We just needed to be smart about how we were going to use our living space with a GIANT tree in the room.

Here is what we had started out with on the other side of the room:


If you have been following for awhile now, when the lower level flooded, we brought up our giant sectional, since it provided more seating than our previous couch did.  It's been working OK in the interim, sure, it's huge, but it's great to have the seating space!

But huge couch and huge tree don't agree with one another.

So even though the family room in the lower level still needs some trim work finished up, we decided to switch the couches back around to make room for the Christmas tree.

Here is the after of the ripple effect, and how it will probably remain moving forward:


The space really opened up by removing the large, dark and heavy piece of furniture.  Everything fits so much better now. 

What's funny to look at now is how the room looked just before the flood....


Those built-ins really just made such a happy difference in our home.  I still smile everyday because of them!

See, told you, tangent....

Here is a view of the room looking back at the tree, all decked out!


Notice, I stuck with the same theme as I did for the holiday display in the adjoining dining area.  Lots and lots of color.  I am a color addict.

For as much as I love a good arts and crafts session, I just didn't go that route with the tree this year.  Remember, I am trying to manage my time.  And crafting for the tree didn't make the cut.  But decorating the tree with the kids did.  As in, they pretty much did it all, I did the top with a stool, but they managed the lower level.  They were good color clumpers.

We just used inexpensive and unbreakable shatterproof ornaments that had lots of bling to them:


I did put a couple of glass ones up higher... just because I loved them so!


For those looking for an inexpensive gift idea.  I wanted to share one of my most favorite Christmas presents ever.  My bff snuck my kids away one day and had them make me ornaments.  She painted their hands white, and stamped them onto a bulb.  Once the paint dried, she turned their teeny tiny fingers into little snowmen, and wrote their name and date on the back.  Melt. My. Heart. 


Try not to cry after receiving that gift.  Not possible.

And some pretty tree topping ribbon finished it off...


So there you have it.  Our holiday decor and more home progress, thanks to a little Christmas tree push. 

Anyone else get their tree home and realize that your eyes may have been bigger than your room?  How did you handle it?  Or lets chat about hand made gifts that brought you to happy tears!  What are the best tear jerking gifts to give?


Jumat, 18 November 2011

Organizing Our Thoughts and Memories

Our coffee table recently got a new accessory that I couldn't be more smitten with...


A closer look at what I am hinting at?


So now let me explain.

I borrowed an idea I actually got from Peyton's brilliant teacher.  Seriously, one of my most favorite ideas.  Especially because I am always so sentimental.  And even if you are not a mushy gooshy like me, this idea may still be genius enough to be adapted to your life anyway.

Each Friday, Peyton brings home a notebook.  Inside the notebook is a back-and-forth journal/letter writing to mom and dad.  He writes us a letter with his current thoughts {or even just about his day and what they did}, then we write back.  Each week we are creating a notebook of memories, feelings and love.  Seriously, fantastic right?!

Why wouldn't I elaborate on that idea for our family?

Of course, any notebook or journal would work perfectly for this idea.  It doesn't have to be pretty or fancy pants, but I found the most incredible coupon code on one of my favorite blogs {I bet if you dig, you might still find it}, that allowed me to order two customized/personalized journals for free, plus the cost of shipping.  Um, yes please and THANK YOU!


I ordered them through Paper Coterie and was left extremely impressed with the quality of the journals {and no, they don't even know I am mentioning them, just sharing my personal opinion}.  The journals arrived quickly and wrapped pretty and they even sent a special little gift.  Gotta love great service like that!  I am so excited that I now have two new coffee table books that will be filled with all of our thoughts and letters to one another!

Yes, I did say two.  I had one book created for our boys:


Following the same theme we have been doing with Peyton, the plan is to write to each boy in here, and even encourage them to write to one another.  It's also a place for me to jot down favorite memories with them, or the funny things they say and do.  I am going to challenge us to fill up the book, and maybe do one annually depending on how successful it is!

The other book is for the hubs and I...


Same philosophy, and I am pretty sure B just lost his man card. 

I have a bit of a hopeless romantic heart in me so hopefully this will be a way we can share our lovey dove feelings with one another.  And keep them and cherish them and then have our kids read them to their kids some day {meaning it will stay PG}.  Hopefully this won't be a giant epic fail... 

So there you have it.  Our new plan to organize our family fun thoughts and memories!


Anyone else do something similar?  How is it going?  Other than photographs, what other creative ways do you have to keep track of your memories?  Anyone else snag a wonderful idea from an unexpected place?