Tampilkan postingan dengan label Paper Clutter. Tampilkan semua postingan

Selasa, 15 Januari 2013

Organizing Our Paper Piles

I love organizing.  Scratch that.  I heart organizing!  But when it comes to paper clutter, I have to say, it's pretty much my absolute least favorite project to tackle.  I like to get crafty, paint and design when I organize.  It keeps me excited and motivated and makes it fun!  But piles and piles of papers.... well, you know.  Not as much fun, that's all.

But it has to be done!  And it turns out, that although I am no paper filing expert, I have done a few things well over the last couple of years.  And, a few things not so right.  But hey, live and learn!

Since this is Home Office month, I vowed to tackle paper piles with you.  I actually blogged about how I filed and organized my paper piles awhile back here and here.  So, consider me half way there already.  I have a file box with files for all of our long term documents.  Life Insurance, Medical Insurance, Retirement, Investment Details, Birth and Marriage Certificates.  You know, those important grown up things that you need in paper form and refer to once in a blue moon, but you need to hold on to.  That system has been working swimmingly.

And then there is all that other paper.... the paper that comes in daily such as statements, cards, receipts, etc... I didn't have much of a system for those papers and that is where I suffered.  I would toss them into random file folders, or worse, a bottomless pit of a box to "deal with another day".  Hanging my head in shame now... but here is what I started with:


So you have a better idea of all of my semi-organized chaos of paper piles, here they are labeled for you.


Bills have a system that I will be sharing next week, but it was the statements, receipts, etc... that didn't.  They were now this:


Throughout 2012 I would toss random papers into a document box and say, "I will get to that another day".  A handful of times I would need to find something, and I would go straight for the box and a few minutes later, I had what I needed.  So, I say it was working so-so.  But absolutely not ideal and absolutely not a system that could continue before it would become major chaos.

Looking at the pile, I saw a plus amongst the negative.  Those were the only statements and papers from the entire year.  And many of those papers were personal docs I created along with random work files, so the fact that our statement pile {bank, mortgage, medical, etc...} was on the low side of things, meant I was doing good about going paperless with everything else.

So how did I tackle my piles?

I started by creating a list of categories for all of the papers I touch every day.  I wanted my file box to continue to hold those long term and personal documents, and I needed an easier system for those every day papers.

Once I had my categories, I used my favorite Washi tape file labeling method {adding fun splashes of color and a non-permanent labeling solution} to folders that I would want to access frequently.


Current projects I am working on, To Do's, Travel docs, Blog Contracts and important statements that I would eventually need to reference {and scan in to go more paperless}.

I laid out all folders on the kitchen table.


And worked my way through the tall stack of papers.  Forty five minutes later and I had all of my paper piles sorted!


This box was now a "To Shred and Recycle" box instead of a paper hoarding box.


And once it was all condensed down, I had systems that now make much more sense and should be simple to maintain.


For our annual tax documents, I had them all together, but I needed a way to keep them divided by year.  So I created a few quick labels for the oldies and future ones.


Then, I picked up some fantastic plastic envelopes which were the perfect solution for holding the important documents along with the corresponding receipts and statements.


Once they were labeled by year, I popped them into a metal basket {found awhile back at HomeGoods}, along with a file folder so I have a quick dropping place for current year tax docs until filing time.


The file box will go back on my desk shelves and the daily folders are now easily accessible above my workspace {accordion desktop file keeper found here}.


I realized that the file box wasn't super quick and easy to access {yes, I am lazy, but I would have to pull it down, open it up, dig through the files each time I wanted to file something away}.  It made sense for fewer and far between docs that I need less frequently.  For the items I need constant access too, popping them up above my desk with labeled folders should make things much more easy to maintain.


So there you have it.  How I am plowing through our personal paper piles.  Although it wasn't the dreamiest project with a beautiful outcome, it is sure to make a positive impact on our day to day lives to have a set and simple place for everything.

To summarize:
  • Only you can decide what you truly need to keep and let go of.  I called some financial institutions to determine how long they can pull our statements should we need them in an emergency.  
  • List out the categories of the types of papers you keep and file down your piles accordingly.
  • Keep your systems simple.  If they are too hard to access or too complex, will you really keep up with it from day to day?
  • Go paperless whenever possible.  We pay 90% of our bills online {only since the other 10% do not offer that as a service yet}.  Statements can be viewed online and can even be saved as a PDF.  For the ones I receive as paper, they will be scanned in and saved, and easier to find down the line as well.
  • Whistle while you work.  Or not.  I played music and it made the task much more happy.  And it wasn't as bad as I thought, in fact, it was like other projects in which I felt accomplished and giddy when all was said and done!
What office project have you been putting off, but now has you jumping for joy now that it is done?  What are your favorite tips for conquering paper piles?


Psst!  I am not a financial pro or consultant, so recycle and shred at your own risk.  I am just sharing what is working for us and how we are trying to handle things better. 

Selasa, 18 September 2012

Washi Tape File Labels

It took me awhile to join in on the Washi tape trend, but now that I have, boy am I smitten!


I have found it around the www. and on Etsy, and even recently spotted some at Target!


Four rolls for $4.  Sweet!

If you check out Pinterest, you can find 1001 ways to use Washi tape.  So, this little idea of mine is probably out there 24 other times, but I was so excited I couldn't resist sharing.

Labels.  Washi tape makes great labels.

I discovered this the other day when looking at a jumbled pile of manila folders that I was using for a few miscellaneous blog and contributor projects.  I have been taking on so many different tasks that I have been keeping details for each in unlabeled folders, and it was getting out of control.

I could have just whipped out my handy label maker or printed out some pretty options from my computer, you know I am a sucker for pretty file labels...  But I wanted something quick, funky and easy to change in the future since the projects I am working on seem to shift at the drop of a hat.


Washi tape.  So simple!  I just put some over the manila folder file tab and trimmed off the excess edges with a small pair of scissors.


Fab right?  And my trusted black Sharpie pen finished it off!


And as I mentioned, my favorite part of it all, is I can swap out the labels quickly and easily and no mess is left behind!


Happy to have made this little discovery.  I have a feeling the ol' tape is going to start getting a lot more use around the Jones abode.  Label happy mama right here.

What is your favorite use for Washi tape?

Selasa, 14 Februari 2012

Greetings! How We Organize Holiday Cards

Happy Love Day!

It dawned on me this weekend that around the holidays, I was getting asked frequently about how I was going to organize all of the greeting cards I had received.  Then, it dawned on me that I hadn't actually ever shared the system with you.  Better late than never!  And since today, cards will be given and received, I thought it was the perfect time to pop in with our system.

Here is what I had started with:


Raise your hand if you have been there.  Or still are?  It's OK.  I promise you are not alone.

I love to take photos, but one thing that seems to happen is that I acquire photos of immediate family, mostly my kids and some of our pets.  Above and beyond that, the photos I have of most of our relatives and friends is limited.  That is why I love photo greeting cards.  I get to keep a great photo of my loved ones, each year!  But what good does it do me to leave them in a pile in a box?  How often do I take time to look back through the old photos and smile?  How often do my kids look at the pictures and watch everyone grow with them?  Not at all.  Because they are in a box.  Out of site, out of mind.

So, I decided to organize them a bit better.  I started out by sorting the photos into stacks, by family.  That way, I could go from there and easily figure out the year of each photo.


From there, I sorted down by year.


To encourage frequent trips down memory lane, I decided I would rather the cards live in a photo album on our family room bookshelf.


I found this album at Target for $8.  Not only is it acid free {which is always important when storing photos}, but it is also has the magnetic pages.  This was important because the greeting cards come in every single shape and size imaginable, and the pages give you the freedom to arrange however is clever {there are no dividers for each photo, just a blank slate of a page}:


The rest was simple.  I just printed the year on a 4x6 index card:


And then added the greetings from that year!  Everything from birth and wedding announcements, to birthday invites and holiday greetings.  Anything that has a photo of a loved one!


Some additional notes:
  • I saved the "year" index card template to my computer so each year I can just print another and keep on going
  • I used my paper slicer to cut down some of the edges of the cards to get them to fit
  • Going forward, I will be writing down the year on the back of the card when it is received, to make any future organizing a breeze
 Such a simple project, it only took me about 30 minutes to get my entire stack put into the album.  And I love it so much, I might just snag another album or two, to keep for expanding year after year.

I am sure you are wondering about greeting cards as well?  The kind without the photo.

I only keep those that are REALLY special.  You know, the ones with sweet words and kind thoughts.  The rest are recycled.  If I kept every single holiday and birthday card for each kid and the hubs and I, they would be coming out of our ears.

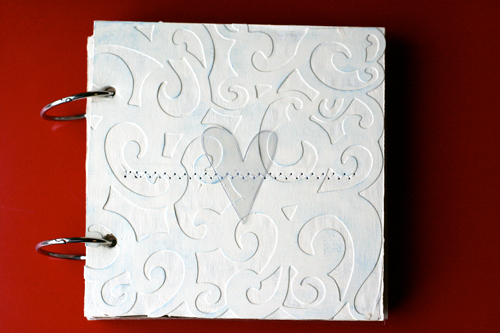
There are a couple of ways to preserve those cards, you could scan them in and keep them digitally, or you could make a card "book" out of them by adding rings:

{source}

Your turn!  How are you organizing your greetings?  Any other fun and creative ideas?  Love ya!


Selasa, 11 Oktober 2011

You Asked: Favorite Organizing Supplies

How has this topic not come up yet?  I am so surprised that this wasn't one of my very first posts.  In fact, it's a question I get frequently, "What are your favorite organizing supplies?  What supplies would you recommend for someone on a quest to get uber organized?"


So my friends, I thought I would put together a list of my top 10 favorite supplies and why {in no particular order}!


1.  Photo Boxes.  Love them.  Sure, they are wonderful for stashing away your extra photo prints, but I use them everywhere for EVERYTHING.  They offer a streamlined look in any space and are great for stashing away my coffee pods in the kitchen, cards and dice in the living room, craft supplies in my office and toiletries in our guest bathroom!  Anything on the smaller size of things can be corralled in these pretty yet simple boxes. 

2.  Shoe Pockets.  Again, a multi-functional product that doesn't just need to be used for shoes.  First, it allows you to expand your storage by utilizing door space vs. floor space which is always a plus.  Second it can hold anything from charging cables to hats and mittens to kitchen supplies.  Gotta heart when one product can offer so many solutions!

3.  Label Maker.  What kind of organizer would I be if I didn't love a good label maker?  I will say however, I don't use it as often as you would think, as I am more in love with handcrafting my own labels.  More on that in a bit.  Therefore, I didn't invest more than $25 on my label maker, but it is absolutely fantastic for labeling spice tins and folder labels and all those itty bitty things.  My biggest tip is to go with the clear tape whenever possible as it provides a much cleaner look.

4.  Scanner/Printer.  Back to making my own labels.  Many times a label maker is limited on changing up font sizes, graphics and colors, so I LOVE to make my own labels for around our home.  A printer helps me achieve this, and I typically always print on standard white cardstock since you can't see through it as easily as regular printing paper and it offers extra durability.  The reason I love to get a printer with a scanner is because it cuts down on the number of products plugged into the computer and allows you to scan in your memories and keep them digitally, which will allow you to free up valuable real estate in our home {think kid's artwork, greeting cards, receipts, old photo prints, etc....}

5.  Clear Storage.  By storing items in clear storage, it allows you to always get a quick visual inventory without having to dig.  This is hugely important in the kitchen to not only keep food fresher for longer, but to also allow you to see what you have before heading to the grocery store, and reducing the chances of over-purchasing things you already have.

6.  Bookcases.  These babies come in endless varieties of shapes and sizes but really can be the multifunctional furniture answer for many organizing dilemmas.  The best part is that it is a piece of furniture that you should always be able to find a use for, so if you move it out of a nursery, you can most likely put it to work in any other space in your home.  I love popping them in an entry for shoes, in a playroom for toys or in a living room for media and books!


7.  Laminator.  A laminator doesn't need to cost you more than $30 from your local big box store either.  They are fantastic for providing longevity in the labels you make, especially in kid's rooms where they will get crumpled and bitten on, or in a garage where it can quickly get dusty.  I typically partner my laminated labels with Velcro because it seems to hold the best and allow you to easily switch them out if necessary.  Of course as a mom I use it for many of the projects I do with the kids as well since again, it allows them to last much longer.

8.  Hooks.  These are one of the least expensive and most effective ways I have found to really maximize the space in a garage.  These hooks can be used to get bikes hung from the ceiling, yard tools hung on the wall and even sporting equipment bags up off of the floor.  Utilizing your vertical wall space in any room is a great way to free up space, but in the garage it is absolutely crucial.

9.  Binders.  Binders are such an inexpensive solution for managing paper clutter.  I use them everywhere to keep categorized items in one place.  Sure, I have one to manage all of our family's household documents, but I also use one for recipes and one for my blog management tools.  Pop an annual calendar in one and DIY your own daily planner.  They are a great solution for LEGO instructions and creating your own inspiration books.  The best part is they take up very little space when it comes to storing them as well.

10.  Decorative Paper.  This should be no surprise to anyone who has been reading this blog for awhile now, but I totally LOVE to add decorative paper to majority of my organizing projects.  This could mean wrapping paper, wall paper, drawer liner or scrapbook paper.  I dig it all.  It always adds color and gives a project a finished look.  I mount my labels on it to give them a matte, I line my drawers with it so I am more excited to keep them tidy and I cover old kleenex boxes and soup cans with it to organize on a budget while keeping things looking pretty.

So there you have it!  My top 10 favorite organizing supplies.  Of course, I have an obsession with baskets and bins as well, you can read more about those favorites of mine here.  Any surprises or Ah Ha's?  What is one item you couldn't live without, when it comes to getting organized?

Jumat, 02 September 2011

Basement Progress - Studio Workspace

I have been determined to get at least one thing done in my future studio, per week.  Could be big, could be small.  And if I get more than thing done, extra credit!

So far I have begun to organize my desk and install some hooks to get my belongings off of the floor.  It's so great that each item checked off of the "To Do" list makes such a difference in how much more I enjoy the space I am in.  And up until now, I just focused on my desk space and made sure I didn't turn my head to see this...


Just a hodge podge of magazines, catalogs, mailing supplies, craft items, etc...  I started by sorting everything down and putting things away that had a home already {like the kid's wooden bowling pin...}.

Since I am doing what I can to get this space in order on a budget, I decided to take a trip to IKEA and pick up some super cheap organizing essentials for my new space.

Item #1: BYGEL Utility Cart $29.99

{source}


I knew it was just what I needed for my laminator and Silhouette machine, ever since I saw it in the new catalog.  It would allow me to roll it to my work station when needed, and tuck it away when I was done.  The drawer could hold all of the machine tools and cords and there would even be more room for additional storage and my paper slicer.  SCORE!

Speaking of additional storage, all of those catalogs and mailing envelopes needed to be corralled, so I thought I would pair them up with this cart, and some extremely inexpensive magazine files!

Item #2:  FLYT Magazine File $1.99

{source}

While Preston assembled the craft cart {he LOVES to help build everything}, I got to work making the magazine files all pretty for my new space.


Notice, I am working at the kitchen table, because at this point, I still have no workspace in my studio without tossing everything to the floor.  Shame shame.

I instantly was forced to come up with some sort of color scheme for the new space.  I knew that I wanted it to be colorful, as I do with most spaces; however, I have gray blue walls and a large orange rug in an adjoining area to be considering of.  My gut is telling me to stick with those colors and bring in some greens, pinks and teals.  I am telling you, colors make me HAPPY.

So I played with a couple of scrapbook paper combinations...


Until I found the perfect ones.  Once I had my paper colors/patterns picked out, I traced the face of the magazine file onto the back of the pretty paper {I had to go at a diagonal to make it fit the 12x12 paper}.


And cut them all out with my paper slicer.


To attach the paper to the face of the magazine file, I used double stick tape on the very top and bottom edges, and then covered the rest of the back of the paper with a very strong glue stick.

Tada!


I chose not to cover the sides since first, I didn't have enough paper and second, they wouldn't really be seen anyway.

Because I was going to be placing different items into the different files, I needed some sort of label.  I had been seeing these ones on BHG all over, and they seemed perfect for this project!

So I printed them out in the circle format first, and figured I could just punch out the circle:


But I couldn't get the punch to work just right and everything was off center and the edges looked crummy....


It just didn't feel right to me....

So I printed onto some of my 2x4 mailing labels...


They were too big.  Strike 2.  Ugh, should have measured first and saved the waste.  My bad.

I had one more size of mailing label I thought I could try, and if that didn't work, I would have to get really creative.


But they worked out just fine!  I just had to trim a little bit of the white off of the edges and stick them on!  Yes!


And then stick the new pretty files onto the cart that Preston had just finished up!  Yes, he got it put together faster than my project got done...


The magazine files fit perfectly along the bottom of the cart, like they were meant to be!  I just love all the storage that the little $32 cart and magazine file combo made!  Now when I look over my shoulder, instead of seeing this...


I now see this!


So much better!  Now I can actually do my next project for the space, in the space!  

Speaking of, I am only about 15% done... so no judging just yet.  Rug needed.  Door to cover under stair storage required.  Trim to be finished.  Light fixture to be created and hung.  Artwork galore.  Giant desk built ins.  Console or dresser to find and refinish.  I can see it...

This got me thinking, how do you store your magazines?  Anyone else hoard them like I do?  What about projects that took you to that strike three zone to get it just right?